Showing posts with label Homemade Toys. Show all posts

Thursday, January 6, 2011

Homemade Giant Geoboard


I had a small plastic Geoboard when I was a kid that I just loved to play with! I've been wanting to buy L one, but I just knew I could make one on my own! 
Once again, the internet came to my "homemade how to" rescue.
I found the exact type of board I had envisioned for the kids HERE.


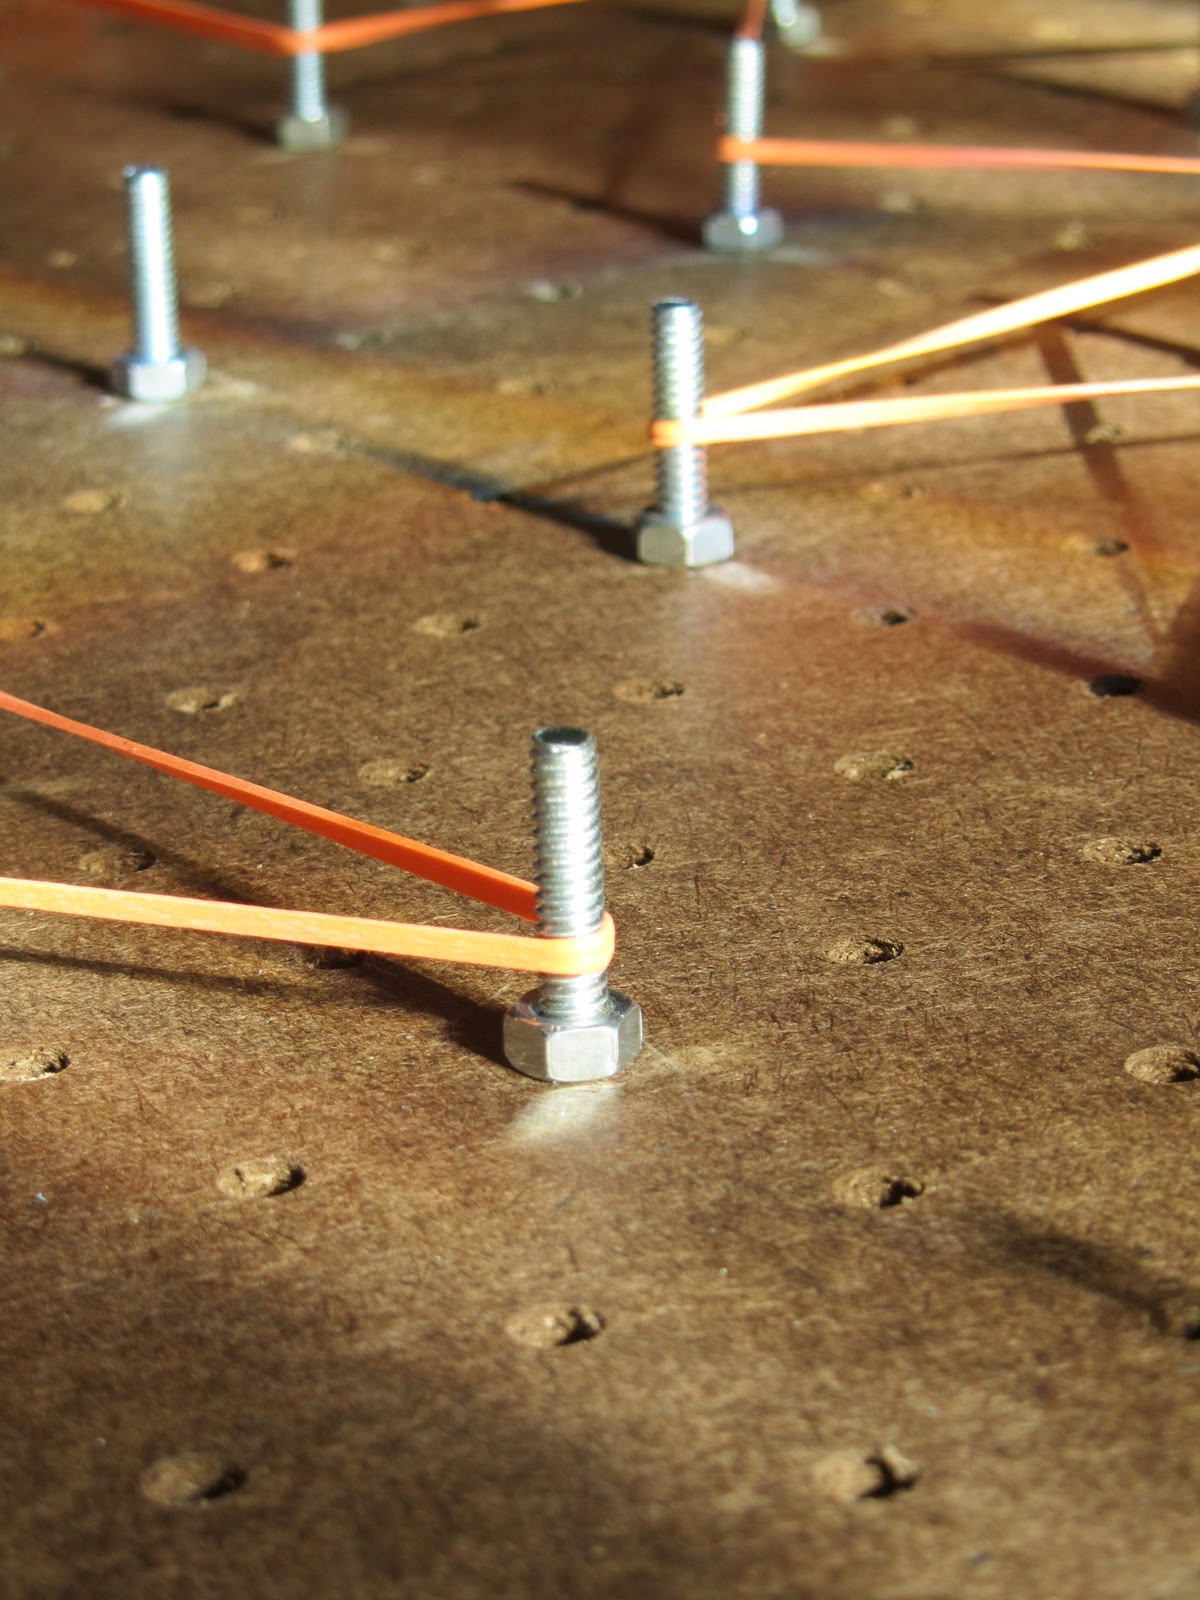
I bought wood PEGBOARD from Lowe's which comes in HUGE sheets and had it cut into 2x2 squares. I only needed that one piece but you still have to buy the whole sheet (around $10.00) so I had the rest cut into 2x2 squares as well. Perhaps i'll gift a few geoboards next Christmas!

I then asked for help finding some bolts and nuts that would fit.
 I knew I wanted the bolt to stick up about 1 inch off of the board.
I ended up with the Machine brand Round Combo w/Nut. 10-24x1/M5.1x25.4 (to be exact)
 I twisted them in every 3rd hole on the board, and secured it with the nut. The back of the board with the round bolt heads is pretty flat with no jagged edges that can be laid on carpet or your bed without snagging.


It became an instant hit and my 12 year old stepson loves to play with it too.


While the bolts aren't sharp on the end, if younger children are playing with this, you'll need to supervise. Falling on the board or even stepping on it could indeed cause pain or injury.


All together I spent about 20 dollars (because I had to buy the whole pegboard). It only took about 30 minutes to put together. For the size that I wanted, it really was worth it to make my own! The kids love it!


Follow Play Create Explore on Pinterest!
Follow Me on Pinterest


More Ways to Follow the Fun!


Monday, November 1, 2010

Jack-o-lantern Acorns


During the Fall I cannot help myself from picking up acorns. It seems that my pockets and the car cup holders are always filled with them. One lazy afternoon I decided to turn a few lucky acorns into jack-o-lanters with simply orange paint and a black fine tipped sharpie. L loved these little guys!


Follow Play Create Explore on Pinterest!
Follow Me on Pinterest
More Ways to Follow the Fun!

Monday, October 18, 2010

Nut Boats


I saw this adorable little crafty activity in the Family Fun magazine (which I just love).
Walnuts are probably one of the best nuts to use but all we have is black walnuts in our backyard, so until our next nature walk, we'll just set our black walnut boats to sail!


I glued my sticks on with superglue but you can also use a small ball of playdough.


This activity was just too cute!
There were moments of sailing and lots of sinking and L loved it!


and we have our champion!


Happy Sailing!


Follow Play Create Explore on Pinterest!
Follow Me on Pinterest
More Ways to Follow the Fun!


Sunday, September 5, 2010

Homemade Puzzles


L and I have been making our own puzzles! I'm kind of addicted to them at the moment, so I plan to make many more! They are so easy, and L can help with a few of the steps. These are great to make as gifts, or to just whip a few extra up to keep as a suprise as an emergency boredom buster!

what you need
Craft Sticks
Modge Podge
picture or printed coloring page (on thicker cardstock paper)

what you do

1. Chose your picture and print it on thicker cardstock paper. If you chose a coloring page, your child can color it first which makes it more fun!

2. Cut it out

3. Lay out enough craft sticks to fit your picture on. My printers ink was low which is why we have a blue and green dinosaur. I kinda like it though :)


4. Modge Podge the back of your picture and then carefully lay it on your sticks.
 Be sure to keep your sticks orderly.


5. Spread the modge podge very generously over the entire picture to seal it, then let it dry. It usually dries in an hour or so.


Adult only Step!
6. After it's completely dry, use an exacto knife to carefully cu
t between the lines of each stick. Do this on the BACK of the puzzle so you keep a straight line.


These are the ones we've made so far.  Numbering them only adds to the play and learn element.


Follow Play Create Explore on Pinterest!
Follow Me on Pinterest
More Ways to Follow the Fun!

Thursday, August 26, 2010

No Sew Bean Bags

I have a sewing machine but HATE to use it. I've been wanting to make little bean bags for Lawson ( I've even bought the felt for this project a long time ago) but was dreading breaking out the sewing machine.
I saw Fabric Glue at Walmart and immediately thought of the bean bags.

what you need
Fabric
Fabric Glue
Something to fill the bags (beans, corn, etc)
Ours are filled with deer corn because I have a ton and needed to use it

what you do
1. cut your fabric to the size and shape you want your bags
2. glue the fabric together but leave a space for filling the bag
3. let it dry for a few hours
4. fill your bags and glue the small opening closed
5. let it dry


EASY AS CAKE


Follow Play Create Explore on Pinterest!
Follow Me on Pinterest
More Ways to Follow the Fun!


ShareThis1