Monday, May 7, 2012

Window Screen Printing


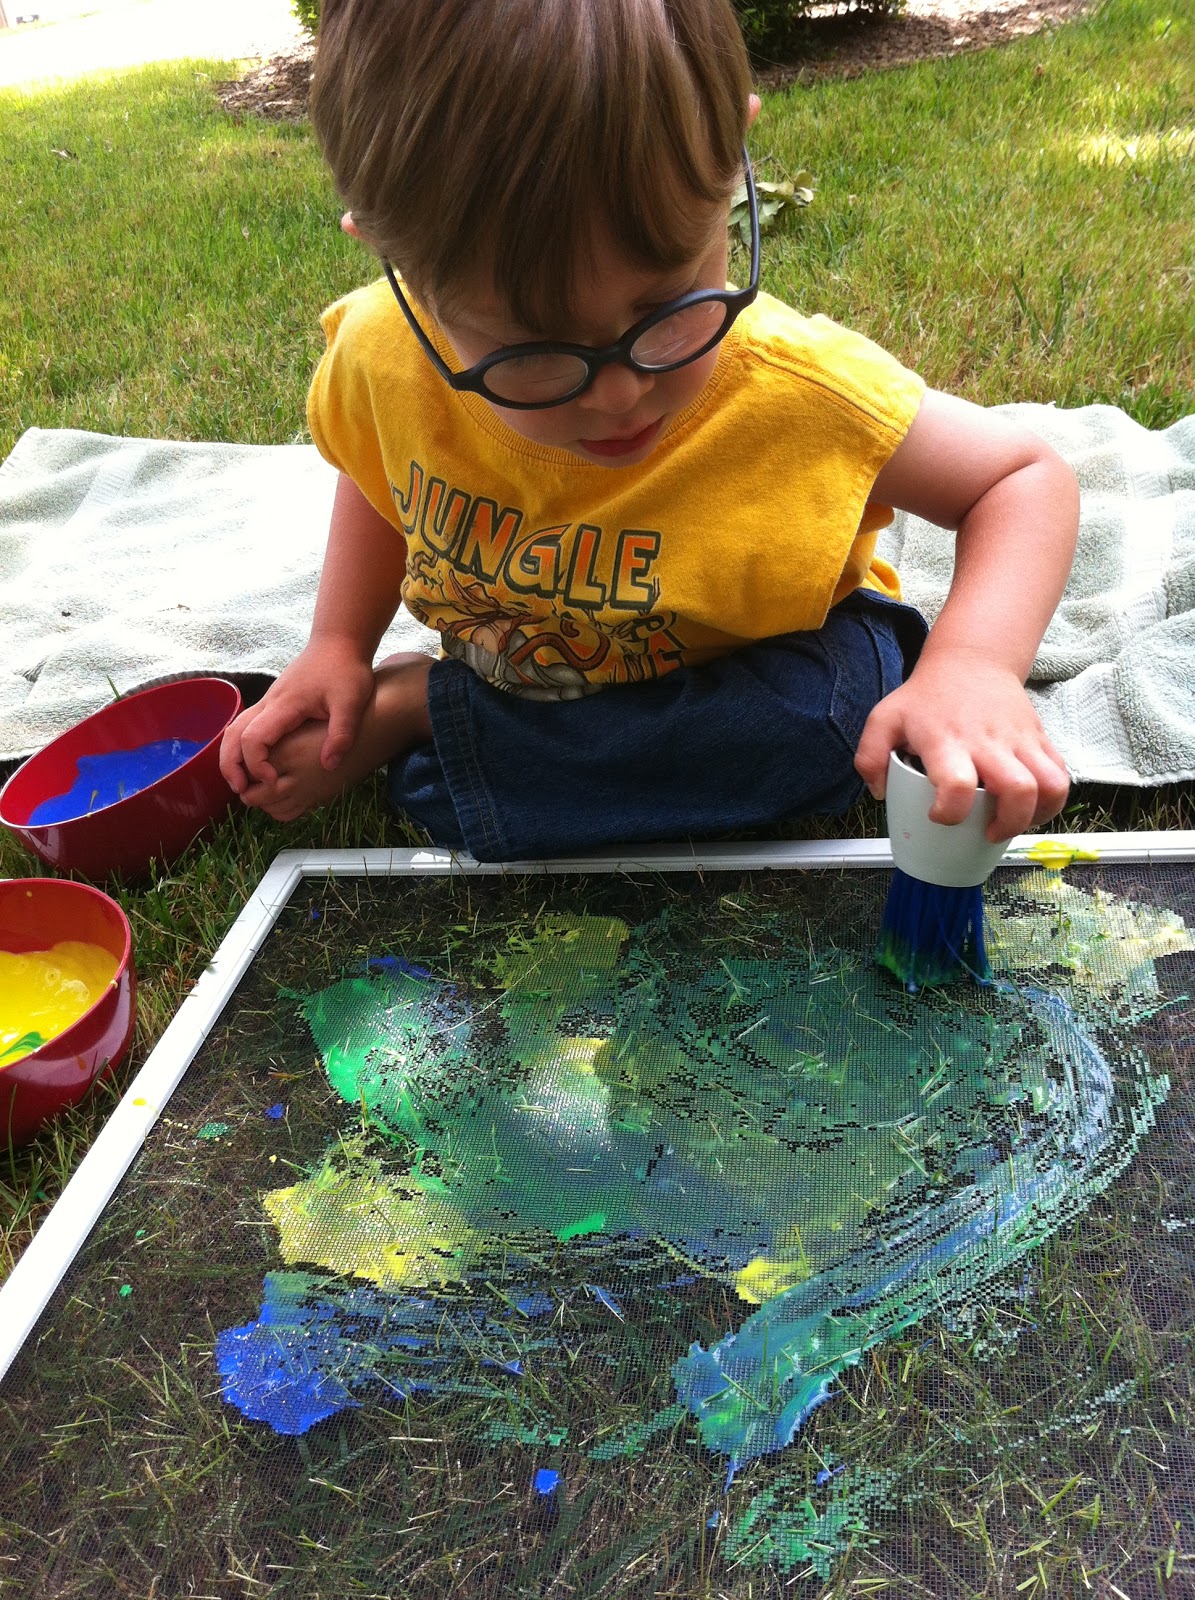
When we make a trip to Lowe's I always look for anything that can be used as some kind of project or activity for L. As we passed by some window screens, I knew right away I wanted to paint on them! Lucky for me they were cheap too! A set of two window screens came to about $7 dollars.

When I got home I searched the blogoverse to see who else has painted on screens and I saw that one of my favorite blogs, Getting Messy with Ms. Jessi, has preschoolers painting on computer moniter filters, which is pretty much the same thing,
and then I was really excited to try our screens!


I set our screen printing space up outside...screens, some paint, paint brushes, and paper, and realized that the grass coming up through the screens would probably make for some neat prints!


We did this two ways.
 We tried painting on the screen first and then laid the paper on top of the screen


and then we also tried painting the screen with the paper underneath


Both ways produced neat results, however I thought the first way produced "cooler" results...more pixelated pictures. We also discovered that the less paint on the screen, the more pixelated the pictures.


We really had a blast with this and we BOTH made lots of screen prints!  When we wanted to "clear" our screens, we just hosed them off really quick, dried them with a towel, and started printing again.


Follow Play Create Explore on Pinterest!
Follow Me on Pinterest
More Ways to Follow the Fun!


Saturday, May 5, 2012

Our Life in Pictures

A picture post
about life during the past few weeks.
We've pretty much been living outside


LOTS of yard play


and long walks down our road....to pick and drink the juice from the honeysuckles


and picking wildflowers to make pretty outdoor arrangements


Lake Walks

and flying a kite with daddy


Finding turtles on the road nearly every day! These two we found almost in the same spot so we took them to a nearby park, set them in front of eachother and hoped that when they popped out of their shells when we left, they would become best friends :)


LOTS of Outdoor Playdates.
When it comes to great friends...i'm feeling pretty blessed these days


Splat Painting at my house


And discovering a water pump at our favorite park...which has now made it an EPIC park!


Lots of Geocaching
if you are unfamiliar with this awesome worldwide outdoor treasure hunt, learn about it HERE


and geocaching with friends is even more fun!


My beautiful boys


Follow Play Create Explore on Pinterest!
Follow Me on Pinterest
More Ways to Follow the Fun!


Thursday, May 3, 2012

Sensory Science Play Teaching Liquid Density


Sensory Science Activity Teaching Liquid Density


Pin It


Ok, so this was one of those happy accident kind of activities. I was busy and L was asking to play with ice. I was quickly trying to think of something new to do with the ice to keep him busy LONGER (hey, just being honest lol) so I dumped a bunch of glitter on the ice. The baby oil was right by the glitter (yes, that is how unorganized my craft space is) so I dumped a bunch of that on there too...at the time I was thinking to myself, "Wow, this is the most rediculous thing i've ever come up with!" lol


However, it turned out to be brilliant sensory play and a terrific science activity teaching simple principles in liquid densities.


I gave him a bowl of warm water and set him up outside by the porch. This activity could also easily be done indoors with a towel under it for easy cleanup and less mess.


He started exploring the ice mixture, saying how "pretty" it was.


and it really was beautiful! 
The oil added an extra shine to everything that was especially brilliant in the sunlight.


And then something cool happened!
He came running in to tell me how "beautiful the ice made the water"...and he was right!
When he dipped the ice into the warm water, the baby oil slid right off the ice and beaded up in the water. The glitter was mixed into the baby oil, so it created gorgeous glittery pools in the water.

AH HA! The perfect moment to teach about the simple principles of liquid density.
Depending on your child's age, they may ask or you may probe the question...
"Why does the oil float on the water?" or "What made those glittery spots on the water?"


There's a simple explanation!
(You probably know this, but I'll break it down in a suggestion on how you might
explain this to your age appropriate child.)

If two liquids with different densities (introduce a new vocabulary word here, but explain that it means "heaviness,") get mixed together, then they get separated based on their "weight."
The liquid with the lower density (the liquid that is less heavy) will float on the liquid with higher density (the heavier liquid). Since the oil is "lighter" than the water, it floats on top of it. 


At very close to 3 years old, L definitely seemed to grasp this concept!
Especially since we had previously done "sink or float?" activities prior to this.


I'd call this activity a happy accident for sure!


Warning
Baby oil can be harmful and even fatal if swallowed. Please use parental discretion based on age and developmental appropriateness when using baby oil in any activity.


Follow Play Create Explore on Pinterest!
Follow Me on Pinterest
More Ways to Follow the Fun!


Tuesday, May 1, 2012

Paint Roller Painting


L had some fun with a small paint roller and his favorite color :)


Follow Play Create Explore on Pinterest!
Follow Me on Pinterest
More Ways to Follow the Fun!

ShareThis1